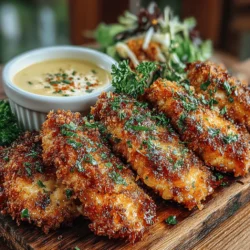
Crispy Chicken Tenders with Honey Mustard Dip: A Culinary Delight
Chicken tenders have long been a beloved staple in many households, celebrated for their crispy exterior and juicy, tender meat. Their universal appeal lies in their versatility—whether served as a quick weeknight dinner, a party appetizer, or a fun meal for kids, chicken tenders never fail to impress. The nostalgia associated with biting into a perfectly cooked tender often brings back memories of family gatherings and casual nights in. In this article, we will delve into a delightful recipe for crispy chicken tenders paired with a tangy honey mustard dip that elevates this classic dish to new heights.
Making chicken tenders from scratch is not only a rewarding experience but also an opportunity to control the ingredients and flavors that go into your meal. Homemade recipes allow you to customize everything according to your preferences, ensuring that what you serve is both delicious and wholesome. The joy of cooking can be found in the simple act of preparing a meal for yourself or your loved ones, and this crispy chicken tenders recipe is a perfect way to embrace that joy.
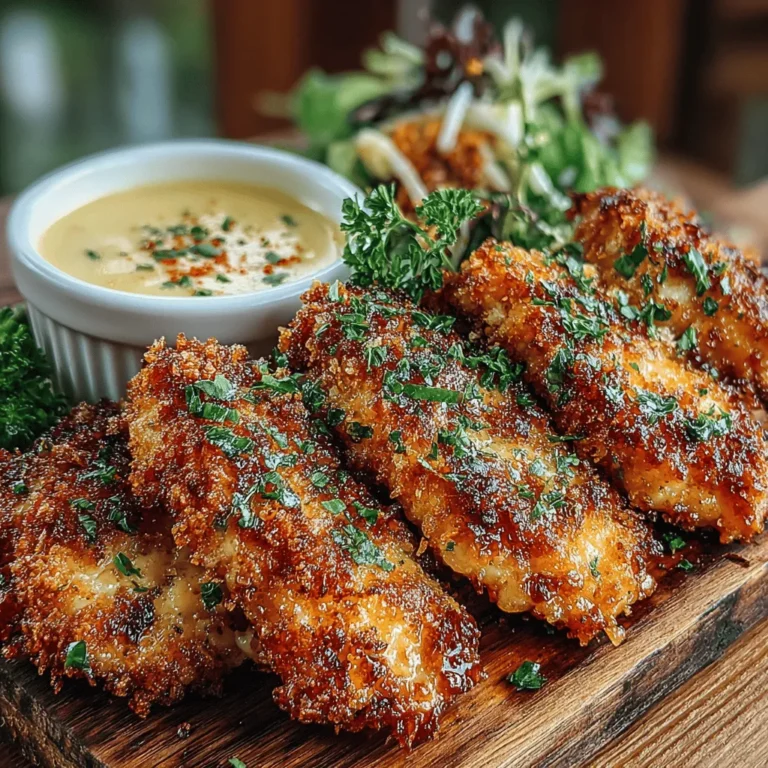
The combination of crispy chicken tenders with a honey mustard dip is particularly appealing for various occasions. Whether you are hosting a game day gathering, preparing a family dinner, or simply indulging in a comforting meal at home, these tenders are sure to be a hit. The crunchy coating contrasts beautifully with the tender chicken inside, while the sweet and tangy dip adds an extra layer of flavor that makes each bite irresistible.
Understanding the Ingredients
To create the best crispy chicken tenders, it’s essential to focus on the quality of the ingredients you choose. Here’s a closer look at the key components of this recipe:
Chicken Breast
The star of the show is undoubtedly the chicken breast. Opting for fresh, high-quality meat is crucial, as it directly impacts the flavor and texture of the finished product. Chicken breast is a lean source of protein, making it a healthier choice compared to dark meat. When selecting chicken, look for breasts that are plump and have a pinkish hue, free from any blemishes or off-odors. If possible, choose organic or free-range chicken for the best taste and ethical sourcing.
Buttermilk
One of the secrets to achieving tender, flavorful chicken tenders lies in the marination process, specifically using buttermilk. This tangy dairy product not only helps to tenderize the meat but also infuses it with flavor. When chicken is marinated in buttermilk, the lactic acid breaks down the proteins, resulting in a juicier and more succulent tender. Additionally, buttermilk adds a subtle tang that complements the savory seasonings used in the recipe.
Seasonings
To elevate the flavor profile of your chicken tenders, a blend of seasonings is essential. Garlic powder, onion powder, smoked paprika, and optional cayenne pepper are key players in this recipe. Garlic and onion powders contribute a savory depth, while smoked paprika adds a wonderful smokiness that enhances the overall taste. For those who enjoy a bit of heat, a touch of cayenne pepper can kick things up a notch. Be sure to adjust the seasoning levels based on your personal preferences, as this will allow you to create a flavor balance that suits your taste.
Coating
The coating is what gives chicken tenders their signature crunch, and for this recipe, Panko breadcrumbs are the secret ingredient. Panko, which is a type of Japanese breadcrumb, is coarser and airier than traditional breadcrumbs, resulting in a lighter, crispier texture when cooked. The unique structure of Panko allows it to absorb less oil during frying, ensuring that your chicken tenders are crispy without being greasy. For an even more flavorful coating, consider mixing in some grated Parmesan cheese or additional spices.
Honey Mustard Dip
A delicious honey mustard dip is the perfect accompaniment to your crispy chicken tenders, providing a delightful contrast to the savory flavors of the chicken. The dip typically consists of equal parts honey and mustard, with the addition of mayonnaise or Greek yogurt for creaminess. This balance of sweetness and tanginess enhances the overall eating experience, making each bite of tender chicken even more enjoyable. Feel free to experiment with different types of mustard—Dijon, yellow, or whole grain—to find the flavor that you love the most.
Step-by-Step Guide to Making Crispy Chicken Tenders
Now that we’ve covered the essential ingredients, let’s dive into the process of making these crispy chicken tenders. The following steps will guide you through marinating the chicken, preparing the coating, and achieving that perfect crispy texture.
Marinating the Chicken
The first step in creating flavorful chicken tenders is to marinate the chicken breast in buttermilk. This step is crucial for ensuring tenderness and infusing the meat with flavor. Place the chicken breasts in a bowl or a resealable plastic bag, and cover them fully with buttermilk. For maximum flavor absorption, it’s recommended to marinate the chicken for at least 1 hour, though overnight marination yields even better results. Ensure the chicken is fully submerged in the buttermilk, and refrigerate during this time.
Tip: If you’re short on time, a minimum of 30 minutes can still provide some benefits; however, longer marination is preferred for optimal tenderness.
Preparing the Coating
While the chicken is marinating, you can prepare the coating. In a shallow dish, combine Panko breadcrumbs with your chosen seasonings: garlic powder, onion powder, smoked paprika, and cayenne pepper if desired. Mix these ingredients well to ensure that the seasonings are evenly distributed throughout the breadcrumbs. Having your coating mixture ready will streamline the process when you’re ready to bread the chicken.
Tip: For a little extra flavor, consider adding a pinch of salt and pepper to the breadcrumb mixture.
Coating the Chicken
Once the chicken has finished marinating, it’s time to coat the tenders. Begin by removing the chicken from the buttermilk and letting any excess liquid drip off. This step is important to ensure that the coating adheres properly.
Using one hand for the wet ingredients and the other for the dry, take a piece of chicken and dip it into the breadcrumb mixture, pressing down gently to ensure an even coating. Make sure to cover every surface of the chicken tender with the breadcrumbs. This three-step coating process—dipping in buttermilk, then into the breadcrumbs—ensures a crispy, flavorful crust once cooked.
After coating each piece, place the chicken tenders on a wire rack or a baking sheet lined with parchment paper. This allows air to circulate around the chicken, preventing it from getting soggy before frying or baking.
Tip: For an even crispier result, you can double-coat the chicken by repeating the dipping process in buttermilk and breadcrumbs.
With the chicken marinated and coated, you are now ready to move on to the cooking phase, where these delicious tenders will transform into a golden-brown delight, ready to be served with your homemade honey mustard dip.
Explanation of Why Each Step is Crucial for Crunchiness
Achieving the perfect crunch in your chicken tenders is an art that combines technique, timing, and the right ingredients. Each step in this recipe is designed to contribute to that ultimate crunch factor. From the marination to the breading process, every detail plays a vital role in creating tenders that are not only crispy on the outside but juicy and flavorful on the inside.
Heating the Oil
The first step in frying your chicken tenders is to heat the oil. The type of oil you choose is important; vegetable oil, canola oil, or peanut oil work best due to their high smoke points. This allows for frying at high temperatures without the oil burning, which can impart an unpleasant flavor to your chicken.
Importance of Oil Temperature for Frying
Oil temperature is crucial when frying chicken tenders. Ideally, you want your oil heated to between 350°F and 375°F. At this temperature, the chicken cooks quickly, allowing the exterior to become golden and crispy while sealing in moisture. If the oil is too hot, the chicken will brown too quickly, leaving the inside undercooked. Conversely, if the temperature is too low, the chicken will absorb excess oil, resulting in soggy tenders.
Techniques for Testing Oil Readiness to Prevent Sogginess
To ensure your oil is at the right temperature, you can use a few simple techniques:
1. Wooden Spoon Test: Dip the end of a wooden spoon into the oil. If bubbles form around the spoon, the oil is ready.
2. Thermometer: For the most accuracy, use a digital kitchen thermometer to monitor the oil temperature.
3. Breadcrumb Test: Drop a few breadcrumbs into the oil. If they sizzle and brown within a few seconds, your oil is ready for frying.
Frying the Chicken
Once your oil is heated, it’s time to fry the chicken. This is where the crispy magic happens.
Best Practices for Frying in Batches
Frying in batches is essential to ensure even cooking. Overcrowding the pan can lower the oil temperature, leading to sogginess. Fry about four to five tenders at a time, depending on the size of your frying pan. This allows each piece enough space to fry evenly and develop a beautiful crust without steaming each other.
Visual Cues for Determining Doneness and Achieving a Crispy Exterior
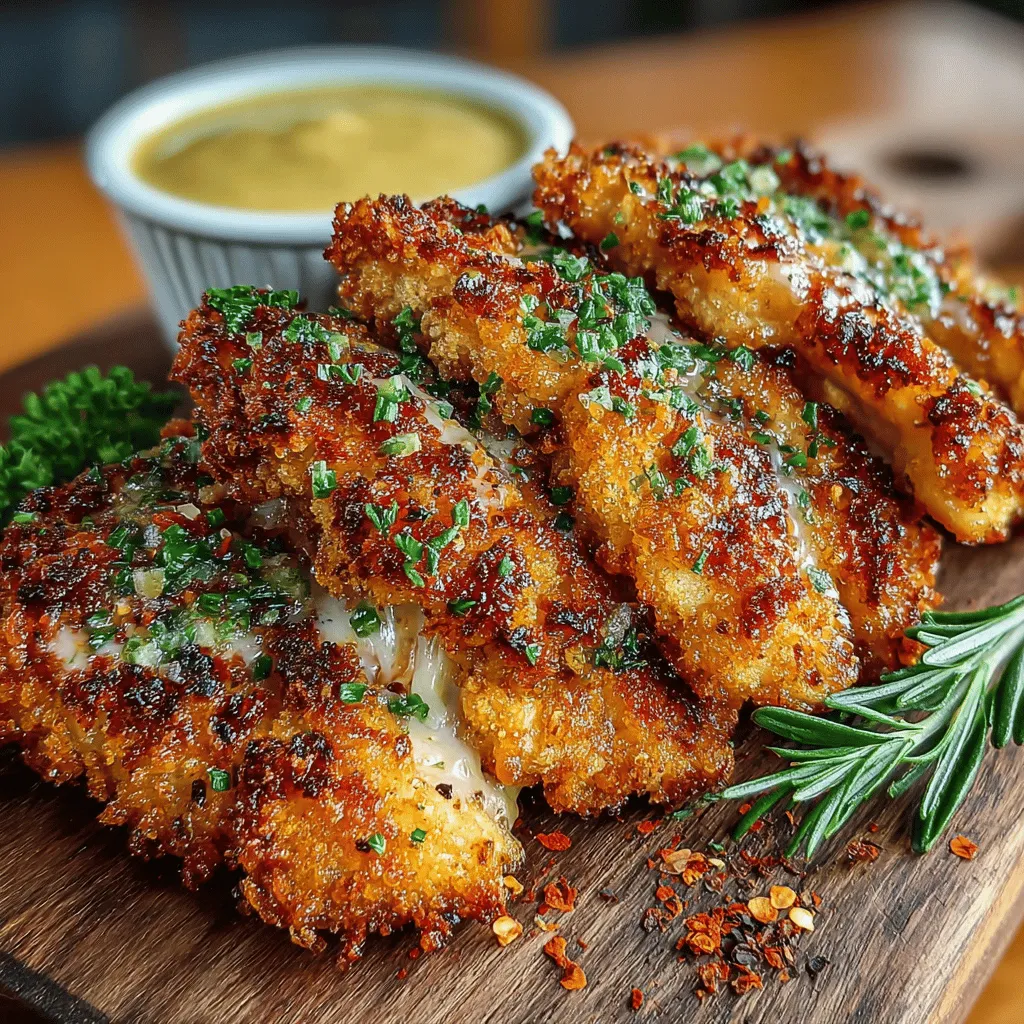
Monitor your chicken tenders closely while frying. You’ll know they’re done when they reach a golden brown color and an internal temperature of 165°F. A meat thermometer can help ensure accuracy. The exterior should be crispy, which can be visually assessed by observing the color. If the tenders are golden brown, you’re on the right track.
Once cooked, transfer the chicken tenders to a wire rack or plate lined with paper towels to absorb excess oil. This helps maintain their crispiness by preventing them from sitting in the oil or steam.
Crafting the Honey Mustard Dip
No chicken tender experience is complete without a delicious dip. The honey mustard dip is a blend of sweet and tangy flavors that perfectly complements the savory chicken.
Step-by-Step Instructions for Preparing the Dip
1. Ingredients: You will need 1/2 cup of Dijon mustard, 1/4 cup of honey, 1 tablespoon of apple cider vinegar, and a pinch of salt and pepper.
2. Mix: In a medium bowl, combine the Dijon mustard and honey, whisking until smooth.
3. Acidity: Add the apple cider vinegar to balance the flavors and enhance the tanginess. Adjust the amount based on your preference for sweetness or tanginess.
4. Season: Add salt and pepper to taste. Mix well until fully combined.
Discussion of Flavor Balance in the Dip and How to Adjust to Personal Preference
Finding the right balance between sweetness and tanginess is key to a great honey mustard dip. If you prefer a sweeter dip, add more honey. For a sharper taste, increase the mustard or vinegar. Tasting as you mix can help you achieve the perfect flavor profile that suits your palate.
Suggestions for Variations on the Honey Mustard Dip
Feel free to get creative with your dip! Here are some variations to consider:
– Spicy Honey Mustard: Add a dash of hot sauce or a sprinkle of cayenne pepper for a spicy kick.
– Garlic Honey Mustard: Incorporate minced garlic for an extra layer of flavor.
– Herbed Honey Mustard: Mix in fresh herbs like dill or parsley for a refreshing twist.
Serving Suggestions and Presentation Tips
Presentation matters when serving your crispy chicken tenders. Here are some ideas to make your dish visually appealing.
Ideas for Plating the Crispy Chicken Tenders
Arrange the chicken tenders on a large platter or individual plates. You can stack them for a rustic look or lay them out in a fan shape for a more elegant presentation. Consider serving them alongside the honey mustard dip in a small bowl.
Suggestions for Garnishes to Enhance Visual Appeal
Fresh herbs like parsley or chives can brighten up your dish. A sprinkle of paprika or a few lemon wedges can also add color and enhance the overall look.
Pairing Options: What to Serve Alongside Chicken Tenders for a Complete Meal
For a complete meal, consider serving your chicken tenders with:
– French Fries or Sweet Potato Fries: A classic pairing that complements the crispy texture.
– Coleslaw: A refreshing side that adds crunch and balances the richness of the chicken.
– Vegetable Sticks: Carrot and celery sticks with ranch dressing bring a fresh element to the table.
– Salad: A simple green salad with a light vinaigrette can round out the meal nicely.
Nutritional Information
Understanding the nutritional content of your dish is essential, especially when balancing indulgence with health considerations.
Overview of Nutritional Benefits of the Ingredients Used
Chicken tenders are a good source of protein, which is vital for muscle repair and growth. The homemade honey mustard dip, made with natural ingredients, avoids the preservatives and additives often found in store-bought versions. Honey provides natural sweetness while bringing antioxidants, and mustard contains beneficial nutrients like selenium and magnesium.
Discussion on Balancing Indulgence with Health Considerations
While crispy chicken tenders are a delicious treat, it’s important to enjoy them in moderation. Balancing this dish with healthier sides, like salads or vegetables, can create a more well-rounded meal. You can also consider baking the tenders instead of frying for a lighter option while still achieving a satisfying texture.
Conclusion
There’s something incredibly satisfying about making your own crispy chicken tenders, especially when paired with a homemade honey mustard dip. This recipe is not just about the food; it’s about creating memorable moments with family and friends around the dinner table. The versatility of this dish makes it perfect for family dinners, parties, or game day snacks.
We encourage you to try this recipe and experience the joy of homemade crispy chicken tenders. The delightful crunch, the sweet and tangy dip, and the satisfaction of cooking from scratch will surely elevate your culinary experience. Enjoy your delicious results and don’t forget to share your creations!