
The Irresistible Charm of Homemade Cinnamon Raisin Swirl Bread
There’s something uniquely comforting about the aroma of freshly baked bread wafting through the home. It evokes feelings of warmth, nostalgia, and a sense of togetherness. When you think of classic homemade breads, one that stands out is the Cinnamon Raisin Swirl Bread—a delightful blend of sweet and spicy that tantalizes the senses. This recipe not only brings a touch of sweetness to your table but also fills your kitchen with the inviting scent of cinnamon, reminiscent of cozy family gatherings and cherished moments.
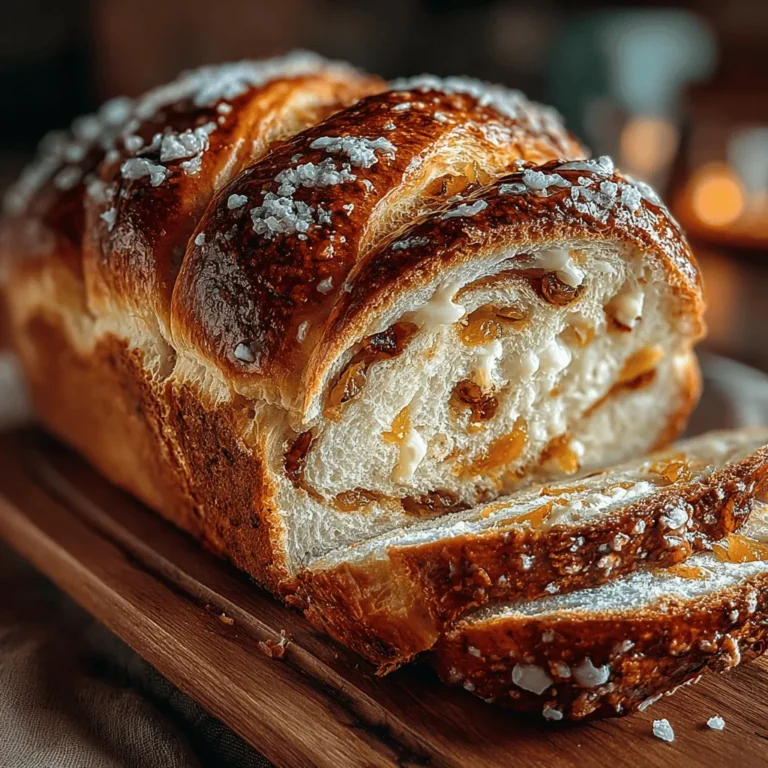
Cinnamon Raisin Swirl Bread is a beautifully crafted loaf that marries the soft texture of bread with the aromatic flavors of warm spices and sweet raisins. The mesmerizing swirl pattern adds a visual appeal, making it an enticing centerpiece for breakfast, brunch, or even as a special treat for afternoon tea. Whether toasted and slathered with butter, or enjoyed plain, this bread is sure to satisfy any craving for something sweet and comforting.
The Appeal of Homemade Cinnamon Raisin Swirl Bread
Baking is not just about the end product; it’s an experience that engages all the senses. The moment you mix the ingredients, the scent of cinnamon begins to permeate the air, stirring memories and igniting a yearning for simpler times. As the dough rises and bakes, the warm fragrance envelops your home, creating an inviting atmosphere that draws family and friends to the kitchen.
Cinnamon raisin bread has deep cultural roots, appearing in various forms across different cuisines. From the classic Jewish challah to the beloved American quick breads, variations of this delightful recipe have earned their place in kitchens around the world. It’s a bread that transcends generations, often enjoyed during holidays, celebrations, or as a simple snack shared among loved ones. The joy of making and sharing homemade bread not only nurtures the body but also feeds the soul, creating connections that last a lifetime.
Ingredients Breakdown
To achieve the perfect Cinnamon Raisin Swirl Bread, understanding the role of each ingredient is essential. Here’s a closer look at the key components that make this loaf so special:
– All-Purpose Flour: This is the backbone of your bread, providing structure and texture. The right balance of protein in all-purpose flour ensures that the bread rises well while maintaining a soft crumb.
– Active Dry Yeast: Yeast is a crucial player in the bread-making process, as it ferments the sugars in the dough, producing carbon dioxide that helps the bread rise. Proper activation of yeast is vital for achieving a light and fluffy loaf.
– Warm Milk: Using warm milk helps to activate the yeast, kickstarting the fermentation process. Additionally, it contributes to the softness and richness of the bread, making every bite tender.
– Sugar: The combination of granulated sugar and brown sugar brings a delightful sweetness to the bread. Brown sugar, in particular, adds moisture and a hint of caramel flavor, enhancing the overall taste.
– Cinnamon: This spice is the star of the show, infusing the dough and the filling with its warm, fragrant essence. Its aromatic qualities pair beautifully with the sweetness of the raisins, creating a harmonious flavor profile.
– Raisins: While you can use any type of raisins, golden raisins are particularly popular for their plumpness and sweetness. They provide bursts of flavor and texture throughout the bread, elevating each slice to new heights.
Step-by-Step Instructions
Now that you have a solid understanding of the ingredients, it’s time to dive into the step-by-step process of making your own Cinnamon Raisin Swirl Bread. Follow these instructions carefully to ensure a successful baking experience.
Activating the Yeast
The first step in any bread-making process is activating the yeast. Start by measuring out your active dry yeast and combining it with warm milk (between 100°F to 110°F is ideal). The temperature is crucial; too hot, and you risk killing the yeast, while too cold will prevent activation. Allow the mixture to sit for about 5 to 10 minutes until it becomes frothy and bubbly. This indicates that your yeast is alive and ready to work its magic in the dough.
Preparing the Dough
Once the yeast is activated, it’s time to prepare the dough. In a large mixing bowl, combine the flour, granulated sugar, and salt. Create a well in the center and pour in the yeast mixture along with the melted butter and any additional warm milk. Mix the ingredients until they come together into a shaggy dough. At this point, you may need to adjust the consistency by adding more flour or a splash of milk, depending on the humidity and temperature of your environment.
Kneading the Dough
Kneading is a critical step in developing the gluten structure of the bread, which gives it the desired elasticity and chewiness. Transfer the dough onto a lightly floured surface and begin kneading it with the palms of your hands. Push the dough away from you, fold it over, and turn it a quarter turn. Repeat this process for about 8 to 10 minutes until the dough is smooth and elastic. You can test if it’s ready by performing the “windowpane test.” Take a small piece of dough and stretch it gently; if it forms a thin, translucent membrane without tearing, it’s ready for the next stage.
With the dough kneaded to perfection, you’re now well on your way to creating a delicious Cinnamon Raisin Swirl Bread that will surely become a cherished recipe in your home.
{{image_2}}
First Rise: Creating the Ideal Environment for Dough to Rise
Once you’ve prepared your dough, the first rise is crucial for developing flavor and texture. To achieve the best environment for your dough to rise, find a warm, draft-free location. An ideal temperature for rising dough is between 75°F to 80°F (24°C to 27°C). If your kitchen is cooler, consider these methods to create warmth:
– Oven Method: Preheat your oven to the lowest setting for just a few minutes, then turn it off and place the covered dough inside. The residual heat will create a warm environment for rising.
– Warm Water Bath: Place the dough bowl in a larger bowl filled with warm water. Ensure the water is not too hot, as it may kill the yeast.
– Heating Pad: If you have a heating pad, set it to low and place the dough on top, covering it with a towel to retain warmth.
Allow the dough to rise until it has doubled in size, which typically takes about 1 to 2 hours. Cover the bowl with a clean kitchen towel or plastic wrap to prevent the dough from drying out.
Preparing the Filling: Ensuring Even Distribution of Cinnamon and Raisins
While your dough is rising, it’s time to prepare the filling. This mixture is what gives the bread its signature flavor and texture. For an even distribution of cinnamon and raisins, follow these steps:
1. Combine Ingredients: In a medium bowl, mix together 1/2 cup (100g) of brown sugar and 2 tablespoons of ground cinnamon. Make sure to break up any clumps in the brown sugar for a smoother mixture.
2. Prepare the Raisins: Use 1 cup (150g) of raisins. For an enhanced flavor, consider soaking the raisins in warm water for about 10 minutes before draining. This plumps them up and prevents them from absorbing moisture from the dough during baking.
3. Blend Together: Once your dough has finished its first rise, sprinkle the cinnamon-sugar mixture evenly over the rolled-out dough and then distribute the raisins. Use your hands to gently press the mixture into the dough to ensure it sticks.
Shaping the Bread: Rolling and Sealing the Dough
After the first rise, it’s time to shape your bread. This process creates the beautiful swirl that makes this bread special. Here’s how to do it properly:
1. Prepare the Surface: Dust your work surface lightly with flour to prevent sticking.
2. Roll Out the Dough: Turn the risen dough onto the floured surface and gently press it down to release any air bubbles. Using a rolling pin, roll the dough into a rectangle approximately 16×12 inches (40×30 cm). Aim for an even thickness of about 1/4 inch (0.6 cm).
3. Add the Filling: After spreading the cinnamon-sugar mixture and raisins, leave a small border (about 1 inch) along the edges to prevent the filling from spilling out.
4. Roll It Up: Starting from one long edge, carefully roll the dough tightly into a log. Make sure to keep it even and tight to maintain the swirl.
5. Seal the Edges: Once rolled, take the edge of the dough and pinch it to seal. You can also tuck the ends under the loaf for a neat presentation.
Second Rise: Recognizing When the Dough is Ready for Baking
After shaping the bread, it’s time for the second rise. This step is essential for achieving a fluffy texture. Here’s how to know when your dough is ready:
1. Cover the Loaf: Place the shaped loaf into a greased loaf pan and cover it loosely with plastic wrap or a clean kitchen towel.
2. Look for the Right Signs: The dough should rise again until it has doubled in size, which may take about 30 to 60 minutes. A simple test to check readiness is to gently press your finger into the dough; if it springs back slowly, it’s ready to bake.
Baking: Achieving the Perfect Crust
When your dough has completed its second rise, it’s time to bake. Here’s how to ensure you achieve the perfect crust and doneness:
1. Preheat the Oven: Set your oven to 350°F (175°C) and allow it to fully preheat. This step is crucial for even baking.
2. Bake the Bread: Place the loaf in the oven and bake for 30 to 35 minutes. The bread is done when it has a golden-brown crust and sounds hollow when tapped on the bottom.
3. Check Internal Temperature: If you have a kitchen thermometer, the internal temperature of the bread should reach around 190°F (88°C).
4. Optional Glaze: For an extra touch, consider brushing the top of the loaf with melted butter or a simple syrup (made from equal parts sugar and water) right after it comes out of the oven for a glossy finish.
Cooling: Importance for Texture and Flavor Development
After baking, it’s vital to cool your bread properly to enhance its texture and flavor. Here’s how to do it:
1. Remove from Pan: Carefully take the bread out of the loaf pan and place it on a wire rack. This allows air to circulate around the bread, preventing the bottom from becoming soggy.
2. Cool Completely: Allow the bread to cool for at least 30 minutes before slicing. This waiting period helps the crumb set, making it easier to slice without squishing the loaf.
Slicing and Serving: Suggestions for Presentation
When it comes to serving your Cinnamon Raisin Swirl Bread, presentation can elevate the experience. Here are some creative ideas:
1. Slicing: Use a serrated bread knife for clean, even slices. Aim for slices about 1 inch thick to showcase the beautiful swirls.
2. Serving Suggestions: Serve the bread warm or at room temperature. It’s delicious on its own, but consider these options:
– Spread with butter or cream cheese for added richness.
– Serve alongside a warm cup of coffee or tea for a comforting breakfast or snack.
– Toast slices and serve with jam or honey for a delightful treat.
Tips for Perfecting Cinnamon Raisin Swirl Bread
Troubleshooting Common Issues
1. Dough Too Sticky or Dry: If your dough is too sticky, gradually add flour, one tablespoon at a time, until it reaches a manageable consistency. Conversely, if it’s too dry, add a little water or milk while kneading until the texture improves.
2. Perfect Rise in Different Environments: If your kitchen is particularly cold, you may need to extend the rising times. Use the oven method or warm water bath to create a conducive environment for yeast activity.
Variations and Customizations
1. Add Nuts: Consider adding walnuts or pecans to the filling for an extra crunch. Chop them roughly and sprinkle them over the cinnamon-sugar mixture.
2. Alternative Fillings: Experiment with different fillings such as chocolate chips, chopped apples, or nut butter for a unique twist.
3. Spice Variations: While cinnamon is classic, you can explore other spices. Nutmeg or cardamom can add depth to the flavor profile.
Nutritional Benefits of Cinnamon Raisin Swirl Bread
Understanding the nutritional components of your ingredients can help you appreciate this delicious bread even more.
1. Cinnamon: Known for its anti-inflammatory properties, cinnamon can help regulate blood sugar levels and has antioxidant benefits.
2. Raisins: These small fruits are packed with fiber, vitamins, and minerals, making them a nutritious addition. They can aid digestion and provide a quick energy boost.
3. Balanced Diet: Cinnamon Raisin Swirl Bread can be part of a balanced diet. Pair it with protein-rich foods like Greek yogurt or nut butter for a satisfying breakfast.
Conclusion
Baking Cinnamon Raisin Swirl Bread at home is not just about the end result; it’s about the joy of the process. From the delightful aroma that fills your kitchen to the satisfaction of slicing into a perfectly swirled loaf, this bread is a classic that brings comfort and warmth to any gathering. Embrace the art of bread-making, and enjoy this treat as part of cozy breakfasts or family gatherings. Whether served plain or with your favorite spreads, this bread is sure to become a cherished favorite in your home.
