
No-Bake Banana Split Bars Recipe: A Refreshing Treat for Any Occasion
In the world of desserts, no-bake recipes have gained immense popularity for their simplicity and delicious results. As we all juggle increasingly busy lives, the desire for easy-to-make treats has never been more pronounced. Enter No-Bake Banana Split Bars—a delightful and refreshing dessert that captures the classic flavors of a traditional banana split, all without needing to turn on your oven. Whether you are hosting a summer gathering, planning a birthday party, or simply want to enjoy a sweet treat with your family, these bars are sure to be a hit.
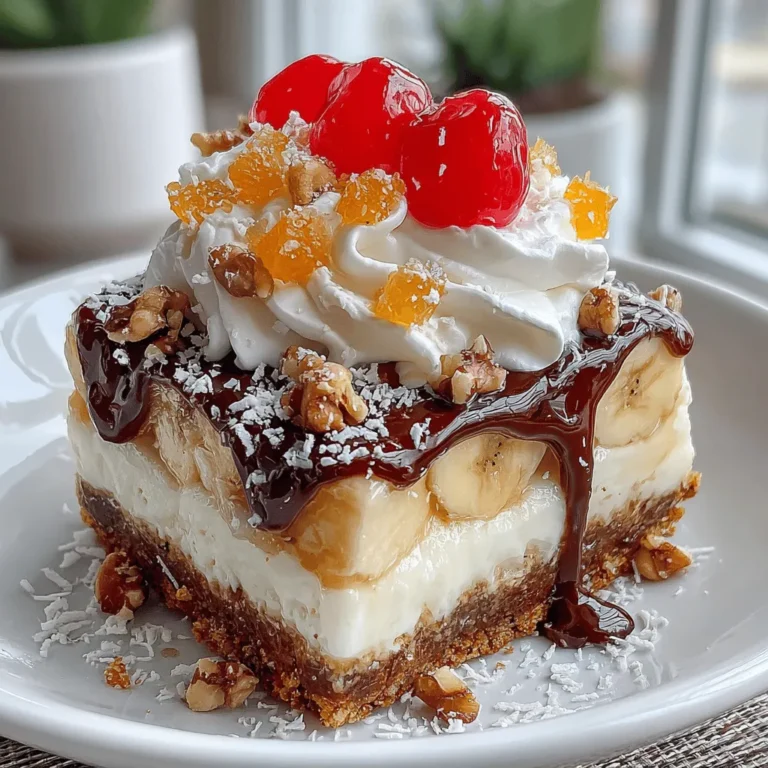
The appeal of No-Bake Banana Split Bars lies not only in their delectable taste but also in their visual charm. With layers of creamy goodness, fruity freshness, and a satisfying crunch, these bars are as pleasing to the eye as they are to the palate. Perfect for any occasion, they can bring a sense of nostalgia to your dessert table while also being versatile enough to adapt to various dietary preferences.
The Allure of No-Bake Desserts
No-bake desserts offer a multitude of benefits that make them a popular choice among home bakers and dessert lovers alike. First and foremost, the convenience of these recipes cannot be overstated. With minimal preparation and no baking required, you can whip up a delicious dessert in a fraction of the time it would take to bake a traditional cake or pie. This is especially valuable during the warmer months when turning on the oven can make your kitchen uncomfortably hot.
Moreover, no-bake desserts are incredibly versatile, catering to a wide array of tastes and occasions. From chocolate mousse to cheesecake, the possibilities are endless. No-Bake Banana Split Bars, in particular, strike a balance between indulgence and freshness, making them suitable for summer picnics, birthday parties, or even a simple family dinner. They appeal to both children and adults, bridging generational gaps with their classic flavor profile.
The ease of preparation also means these desserts are accessible to novice bakers. If you’re looking to engage kids in the kitchen or impress guests with minimal effort, no-bake treats like these bars are perfect. Plus, they can be made ahead of time, allowing you to spend more time with your loved ones rather than stressing over dessert just before your guests arrive.
Understanding the Ingredients
Before diving into the step-by-step instructions for making No-Bake Banana Split Bars, it’s essential to understand the key ingredients that contribute to the overall flavor and texture of this delightful dessert. Each component plays a vital role in creating the perfect balance of taste and consistency.
Graham Cracker Crumbs: The foundation of the crust, graham cracker crumbs provide a sweet, crunchy base that complements the creaminess of the filling. Their subtle flavor makes them an ideal choice for a variety of dessert recipes, but in this case, they evoke the nostalgia of summer treats.
Unsweetened Cocoa Powder: This ingredient enhances the chocolate flavor of the bars, adding depth and richness to the dessert. It balances the sweetness of the other ingredients while providing that quintessential chocolatey taste that pairs perfectly with bananas and whipped cream.
Powdered Sugar: Contributing to the sweetness and giving the crust a smooth texture, powdered sugar dissolves easily, ensuring that your crust is both flavorful and easy to work with.
Unsalted Butter: Acting as a binding agent for the crust ingredients, unsalted butter helps to hold everything together while also adding a rich flavor. It’s important to use unsalted butter so you can control the saltiness of the dessert.
Bananas and Pineapple: These fruits are the stars of the show, lending a layer of natural sweetness and freshness to the bars. Bananas are not only delicious but also packed with vitamins and minerals, while pineapple adds a tropical zing that brightens the overall flavor profile.
Whipped Cream: Adding a creamy and dreamy texture, whipped cream is essential for achieving the light and airy filling that No-Bake Banana Split Bars are known for. It also adds a luxurious element that makes these bars feel indulgent.
Chopped Nuts: For those who enjoy a bit of crunch, chopped nuts such as walnuts or pecans can elevate the flavor and texture of the bars. They bring a nutty richness that complements the sweetness of the fruit and cream.
Chocolate Sauce and Maraschino Cherries: These classic toppings are what truly transform No-Bake Banana Split Bars into a nostalgic dessert reminiscent of the beloved ice cream treat. The chocolate sauce adds an extra layer of decadence, while the cherries provide a pop of color and flavor.
Optional Shredded Coconut: For an added tropical twist, consider incorporating shredded coconut into your bars. This ingredient not only enhances the texture but also complements the banana and pineapple beautifully, making each bite a delightful experience.
Step-by-Step Instructions
Now that you have a solid understanding of the ingredients, it’s time to get started on making your No-Bake Banana Split Bars. The first step in this delicious journey is preparing the crust.
Preparing the Crust
1. Gather Your Ingredients: You will need graham cracker crumbs, unsweetened cocoa powder, powdered sugar, unsalted butter, and a pinch of salt. Make sure your butter is softened to room temperature for easy mixing.
2. Combine Dry Ingredients: In a large mixing bowl, combine the graham cracker crumbs, cocoa powder, and powdered sugar. Stir these ingredients together until they are evenly blended, ensuring that no lumps remain.
3. Add Butter: Next, add the softened unsalted butter to the dry mixture. Using a fork or a spatula, mix the ingredients together until the mixture resembles wet sand. You want the butter to be well incorporated, so take your time with this step.
4. Press into a Pan: Once the crust mixture is ready, transfer it to a greased or lined 9×9-inch baking dish. Using your hands or a flat-bottomed measuring cup, press the mixture firmly into an even layer across the bottom of the pan. This step is crucial as it creates a solid foundation for the layers that will follow.
5. Chill the Crust: After pressing the crust down, place the pan in the refrigerator for about 30 minutes. This will help the crust firm up, making it easier to layer on the filling.
As you complete the crust preparation, let your anticipation build for the delicious layers that will follow. The next steps will involve creating the creamy filling and adding the beautiful fruit layers, making your No-Bake Banana Split Bars a truly irresistible treat. Stay tuned as we delve deeper into the layers that make this dessert a crowd-pleaser!
{{image_2}}
Tips on Achieving the Ideal Texture
Achieving the perfect texture in your No-Bake Banana Split Bars is essential for creating a delightful dessert that holds together yet melts in your mouth. Here are some tips to help you get that ideal texture:
– Use Ripe Bananas: Ripe bananas, which are slightly speckled, provide natural sweetness and creaminess. Overripe bananas can be too mushy, while underripe ones may not offer the flavor you want.
– Cream Cheese Temperature: Ensure that your cream cheese is at room temperature before mixing. This will help it blend smoothly with the other ingredients, preventing lumps and ensuring a creamy filling.
– Use Cold Heavy Cream: When whipping the cream, make sure it’s chilled. Cold cream whips better and holds its shape longer, giving you that fluffy texture that complements the dessert beautifully.
Layering the Ingredients
Importance of Layering for Flavor and Presentation
Layering not only enhances the flavor but also elevates the presentation of your No-Bake Banana Split Bars. Each layer adds a distinct taste and texture that contributes to the overall enjoyment of the dessert.
How to Properly Layer Bananas and Pineapple
When layering the bananas and pineapple, start with the crust, then follow these steps:
1. First Layer – Bananas: Slice the ripe bananas into thin rounds and layer them evenly over the cream cheese mixture. Make sure to cover the entire surface to ensure every bite has banana flavor.
2. Second Layer – Pineapple: Drain the crushed pineapple thoroughly to avoid excess moisture, which can make the bars soggy. Spread the pineapple evenly over the banana layer, allowing the sweet and tangy flavor to seep into the bars.
These layers not only provide a burst of flavor but also create a visually appealing contrast that makes the dessert more enticing.
Creating the Whipped Cream Layer
Techniques for Achieving a Smooth and Fluffy Whipped Topping
The whipped cream layer is crucial for adding lightness and richness to the No-Bake Banana Split Bars. Here’s how to create a smooth and fluffy topping:
1. Chill Your Tools: For the best results, chill your mixing bowl and beaters for at least 10-15 minutes in the freezer before whipping the cream. This helps the cream whip more efficiently.
2. Use Heavy Cream: Heavy whipping cream contains a higher fat content, allowing it to whip up beautifully and hold its shape. Start whipping on a low speed to avoid splattering, then increase the speed as the cream thickens.
3. Sweeten to Taste: Once soft peaks form, add powdered sugar gradually until you reach your desired sweetness. Powdered sugar dissolves more easily than granulated sugar, contributing to a smoother texture.
4. Fold, Don’t Stir: When incorporating the whipped cream into the cream cheese mixture, gently fold it in to maintain the airiness. This step is key to achieving that light, fluffy consistency.
Final Assembly and Presentation
Importance of Presentation in Dessert Appeal
The visual appeal of your No-Bake Banana Split Bars plays a significant role in making them irresistible. A well-presented dessert can elevate any occasion, making it more festive and special.
Suggestions for Garnishing with Nuts, Coconut, and Cherries
Once your layers are assembled, consider garnishing your bars for that extra touch:
– Chopped Nuts: Sprinkle chopped walnuts or pecans over the whipped cream layer for a crunchy texture that complements the creamy layers beneath.
– Shredded Coconut: Toasted coconut adds a delightful flavor and texture. Sprinkle it on top for a tropical twist.
– Maraschino Cherries: Top each bar with a cherry for a classic banana split touch. It adds a pop of color and a nostalgic flavor that ties the dessert together.
Chilling and Setting the Bars
Explanation of Why Chilling is Crucial for Texture and Flavor Melding
Chilling your No-Bake Banana Split Bars is essential for allowing the flavors to meld and the layers to set properly. The chilling process firms up the cream cheese and whipped cream layers, making the bars easier to cut and serve.
Recommended Chilling Times and Tips for Best Results
– Chill Time: Aim to chill the bars for at least 4 hours. However, for best results, overnight chilling is recommended. This extended time allows the flavors to develop fully and creates a more cohesive texture.
– Covering: Cover the bars with plastic wrap or aluminum foil while chilling to prevent them from absorbing any odors from the refrigerator and to maintain their freshness.
Serving Suggestions
Ideas for Serving No-Bake Banana Split Bars at Events
These bars are perfect for various occasions, from casual family gatherings to more formal events. Here are some ideas for serving them:
– Potlucks: Cut them into bite-sized squares for easy sharing. Their vibrant layers make them visually appealing on any dessert table.
– Birthday Parties: Serve them on a decorative platter with colorful dessert plates. Consider adding a scoop of ice cream on the side for an indulgent treat.
– Picnics: Pack them in an airtight container. They are a refreshing dessert option perfect for warm weather.
Presentation Tips for an Eye-Catching Display
To create an eye-catching display, consider the following:
– Layered Display: Use clear glass containers or jars to showcase the beautiful layers of the bars. This adds a level of sophistication while allowing guests to admire the dessert.
– Colorful Plates: Serve on bright or patterned plates that complement the dessert’s colors, enhancing the overall presentation.
How to Store Leftovers for Optimal Freshness
If you have leftovers (which is unlikely due to their deliciousness), store them in an airtight container in the refrigerator. They can last for up to 3 days, maintaining their flavor and texture. Avoid freezing, as the texture may suffer once thawed.
Nutritional Insights
Brief Discussion on the Nutritional Aspects of the Ingredients Used
No-Bake Banana Split Bars are a delightful treat that can also provide some nutritional benefits:
– Bananas: They are a great source of potassium, vitamin C, and dietary fiber, contributing to overall health and digestion.
– Pineapple: This tropical fruit is rich in vitamins and minerals, including vitamin C and manganese, and contains bromelain, an enzyme that may aid digestion.
– Cream Cheese and Whipped Cream: While these ingredients add richness, they also contain fats and calories. You can opt for reduced-fat versions for a healthier twist.
Benefits of Including Fruits in Desserts
Incorporating fruits into your desserts not only adds natural sweetness but also boosts nutritional value. Fruits like bananas and pineapples provide vitamins, minerals, and antioxidants, making your dessert a bit more wholesome.
Considerations for Those with Dietary Restrictions
For those with dietary restrictions, consider making the crust using gluten-free graham crackers or a nut-based crust. This allows everyone to enjoy the bars without compromising their dietary needs.
Conclusion
In summary, No-Bake Banana Split Bars are a simple yet scrumptious dessert that captures the essence of summer in every bite. Their layered composition not only provides a burst of flavor but also offers a delightful texture that is sure to impress your guests.
We encourage you to try making these bars for your next gathering, whether it be a family celebration or a casual get-together with friends. The joy of sharing homemade treats with loved ones is unparalleled, and these bars are sure to be a hit, bringing smiles and satisfaction all around. Enjoy the process of creating this delicious dessert, and revel in the delightful experience it brings!
